
Learn
How Air Duct & HVAC Sanitization Works
Inspection, source removal, negative-pressure cleaning, sanitizing/antimicrobial treatment, and the before/after air quality improvement.
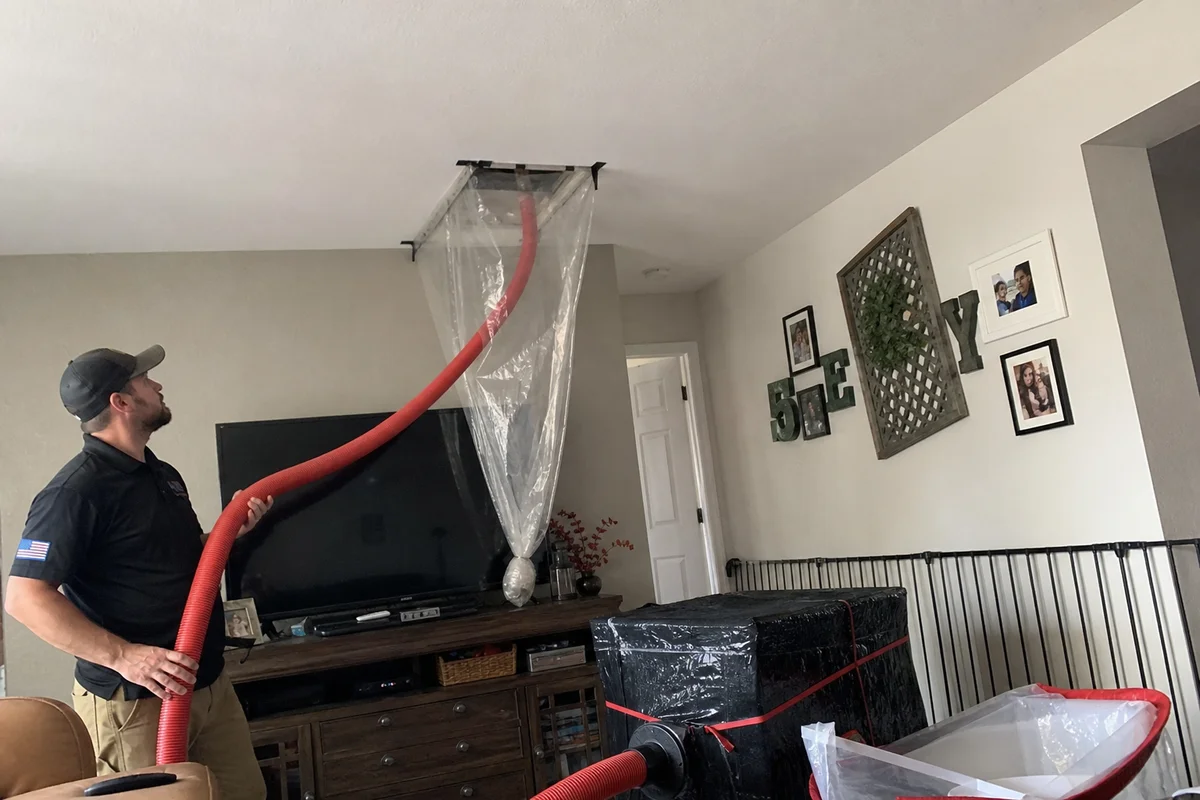
Real duct cleaning is more than pulling off a vent cover and running a vacuum hose. Proper HVAC sanitization is a systematic mechanical process — here’s how it actually works.
Step 1: System inspection
Before any cleaning, we assess:
- Duct system layout and materials (rigid metal vs flex duct, sizes, runs)
- Contamination type and severity (dust, soot, mold, debris)
- HVAC unit condition (blower, coil, filter)
- Access points for cleaning equipment
- Any structural issues (disconnected joints, damage) requiring repair
We often use borescope cameras to see inside ducts without dismantling. This tells us what we’re actually dealing with — critical for scoping the work correctly.
Step 2: Prep and containment
- HVAC unit shut off and locked out
- Vents and registers sealed (except those being actively cleaned)
- Return openings capped
- Access hatch cut in the main return duct (or existing panels used) for equipment connection
Step 3: Negative-pressure connection
A high-powered vacuum (mobile trailer-mounted for residential jobs, larger for commercial) connects to the return-side ductwork. This creates negative pressure throughout the system — everything inside the ducts is pulled toward the vacuum.
Without negative pressure, debris disturbed during cleaning would blow into your home. With it, everything stays in the system and gets captured.
Step 4: Source removal
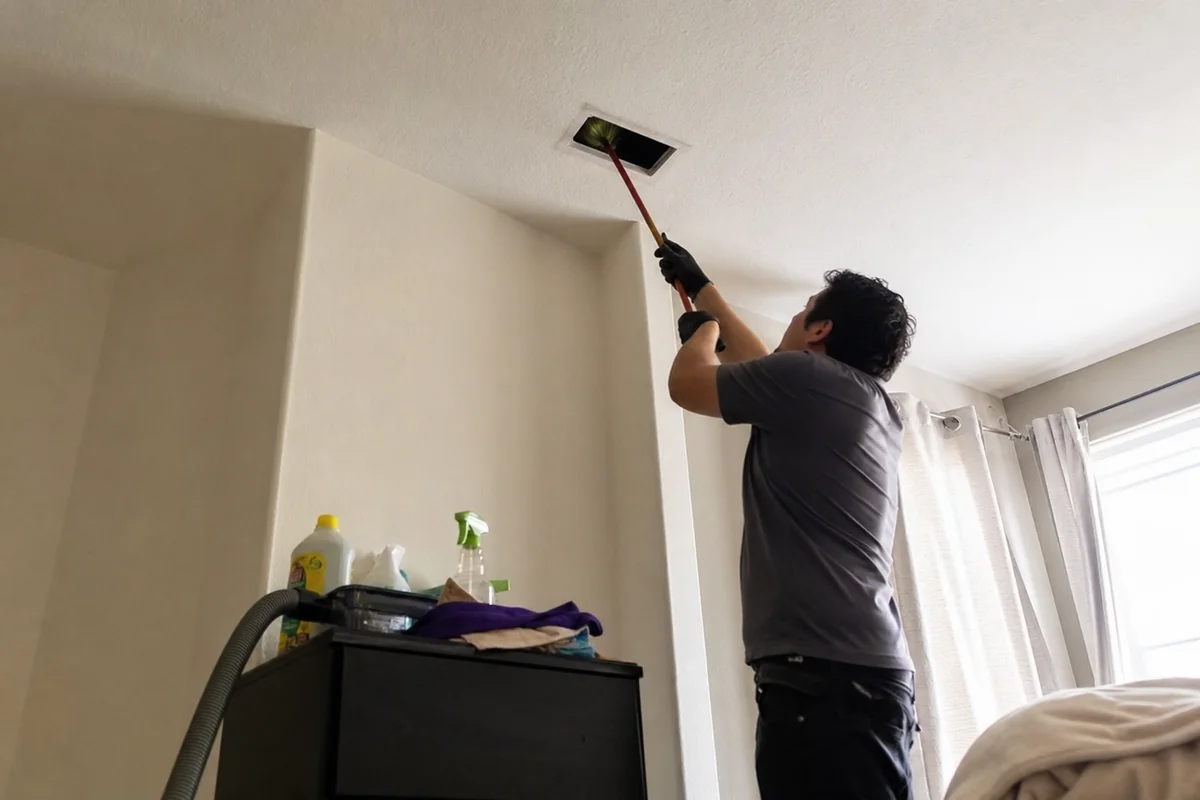
Under negative pressure, we go through the system one branch at a time:
- Air whip tools with compressed air dislodge debris from duct interiors
- Brushes on flexible shafts scrub duct walls
- Vacuum captures everything through the main negative-pressure connection
- Each supply and return run treated individually
- Cleaning continues until the duct interior is visibly clean via inspection
Step 5: Component cleaning
Beyond ductwork, we clean:
- Registers and grilles — physically removed, washed, reinstalled
- Blower housing — HEPA vacuumed, wiped down
- Blower wheel — cleaned when accessible (sometimes requires removal)
- Evaporator coil — cleaned when accessible; specialized coil cleaner
- Furnace interior — HEPA vacuumed
The evaporator coil is often the most-contaminated component and the biggest impact on air quality when cleaned properly.
Step 6: Sanitization
After physical cleaning, EPA-registered antimicrobial treatment is applied:
- Broad-spectrum antimicrobial for general microbial reduction
- Antifungal treatment when mold is a concern
- Product-specific application per label directions (concentration, dwell time)
- Fog application for even coverage throughout the system
Sanitization is not a substitute for physical removal. It treats what’s left after the mechanical cleaning is complete.
Step 7: Filter replacement and system restart
- New high-quality filter installed (MERV 11 or higher for typical residential; higher for allergy-sensitive)
- HVAC system restarted and tested
- Airflow verified at all registers
- Any issues identified during cleaning flagged for repair
Step 8: Documentation
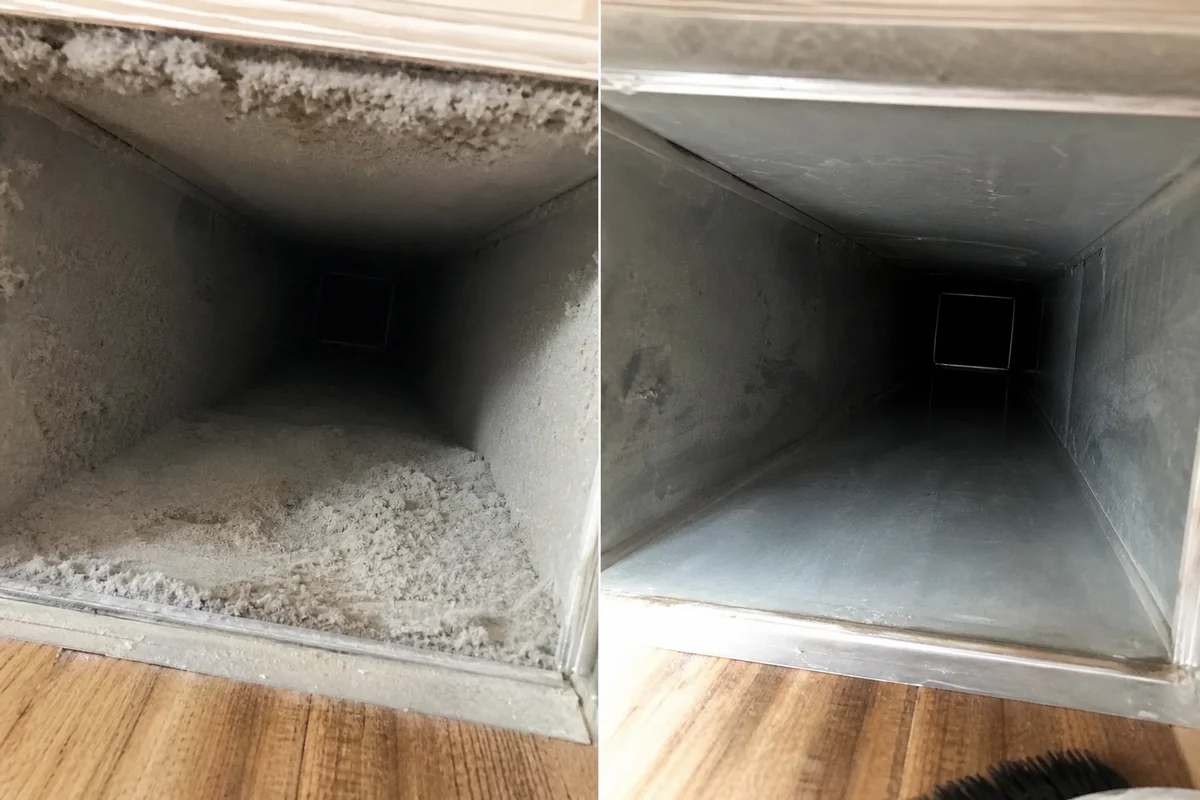
- Before/after photos of duct interiors and components
- Scope of work performed
- Products used (with EPA registrations)
- Any recommendations for future maintenance or system upgrades
What “proper” cleaning looks like vs quick-and-dirty
Proper cleaning (what we do):
- Negative-pressure setup with mobile trailer vacuum
- Agitation and mechanical debris removal
- Component-level cleaning (blower, coil)
- EPA-registered antimicrobial
- Before/after documentation
Quick-and-dirty (“$99 whole house special”):
- Shop vacuum on vent openings only
- No agitation, no negative pressure
- Vent covers cleaned; nothing else touched
- No sanitization
- No documentation
The difference in results is dramatic. Quick-and-dirty cleaning often produces no measurable IAQ improvement.
When cleaning isn’t enough
For systems with:
- Active mold growth in the ductwork
- Sewage contamination in the system
- Extensive rust or damage to ducts
- Fiberboard ducts that have been contaminated
Cleaning may not be sufficient. Some materials must be replaced. Some contaminations require coordinated mold remediation with containment and testing (see our mold remediation service).
Cost expectations
- Basic residential system: $400 to $800
- Larger residential with heavy contamination: $800 to $1,500
- Post-restoration cleaning as part of insurance scope: typically covered under the loss
Call us
For HVAC cleaning after damage or as preventive maintenance, call (720) 842-1950. Related: when air ducts need cleaning after damage and HVAC service page.